DMARC for Small Businesses in 2026: Setup Guide (No Developer Needed)
Scammers send emails every day pretending to be from businesses like yours. A customer gets a fake invoice that looks like it came from your company, pays it, and then comes back angry when the real invoice arrives.

Or worse — a phishing email goes out to thousands of people using your domain name, and suddenly your real emails start landing in spam folders because mailbox providers no longer trust your domain.
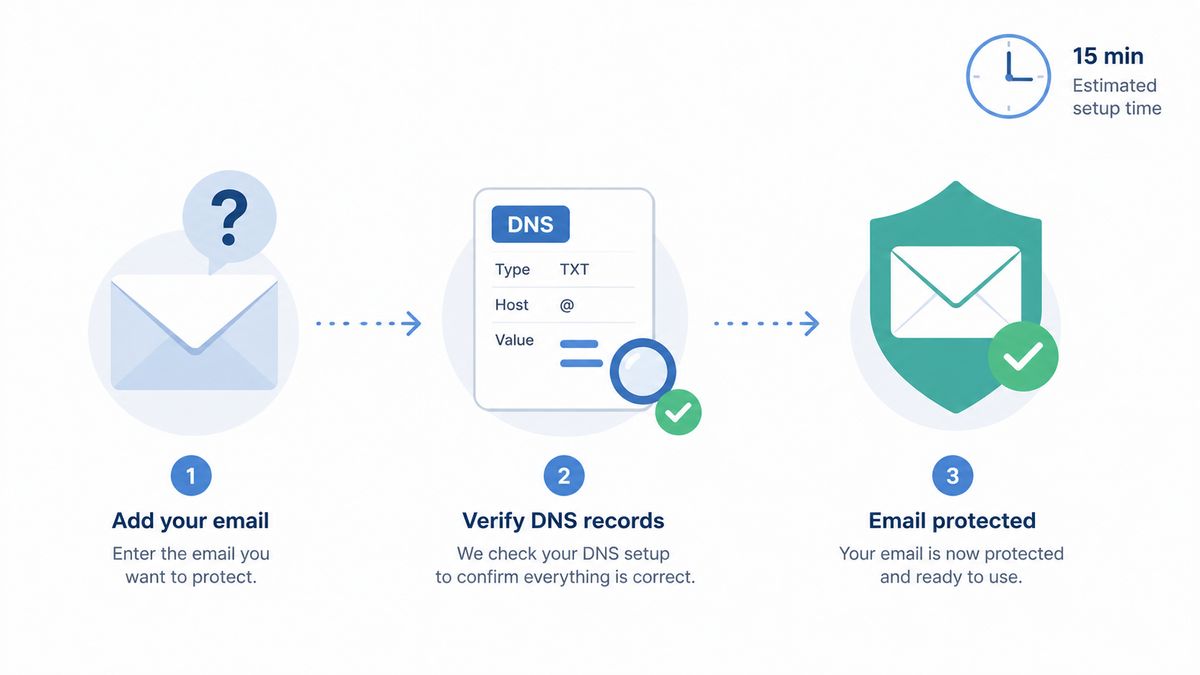
DMARC is the tool that stops this. Setting it up in its safest "monitor" mode takes about 15 minutes, costs nothing, and you don't need a developer. This guide walks through the exact steps for small business owners and office managers who don't have a tech background.
Why this matters in 2026
Two reasons, both costly if ignored.
Phishing damages your customers and your reputation. When scammers spoof your domain and trick your customers, you don't just lose those customers — you lose every customer who hears the story.
Email deliverability is getting stricter. Since 2024, Gmail and Yahoo have required DMARC for any domain sending more than 5,000 emails a day. Microsoft followed in 2025, and the thresholds keep dropping. Without DMARC, your legitimate emails — invoices, order confirmations, newsletters — increasingly land in spam, even at low volume.
What you'll need before you start
Three things:
- Access to your domain's DNS settings. This is usually wherever you bought your domain — GoDaddy, Namecheap, Cloudflare, Google Domains, or your web host. If you don't have the login, find the person in your company who does.
- A list of services that send email on your behalf. Your email provider (Google Workspace, Microsoft 365), plus anything that sends from your domain — Mailchimp, QuickBooks, your CRM, your support desk software. Don't worry about being exhaustive yet; the reports will surface anything you forget.
- About 15 minutes. That's it for the basic setup. Reading the reports comes later.
Step-by-step walkthrough
Step 1: Check if SPF is already in place
What you're doing: Looking up whether your domain already has an SPF record.
Why: SPF (Sender Policy Framework) is a guest list of mail servers allowed to send email for your domain. DMARC builds on top of SPF, so SPF needs to exist first. Most domains already have one because email providers add it during setup, but it's worth checking.
How: Use the free SPF checker on simpledmarc.com/tools, type in your domain (like yourcompany.com), and run the lookup. If you see a record starting with v=spf1, you're set. If you see "No SPF record found," you'll need to add one — your email provider's help docs have the exact value to use.
What to expect: A successful lookup shows something like:
v=spf1 include:_spf.google.com ~all
That example is for Google Workspace. Microsoft 365, Zoho, and others have their own values.
Step 2: Confirm DKIM is turned on in your email provider
What you're doing: Making sure DKIM is enabled in your email account settings.
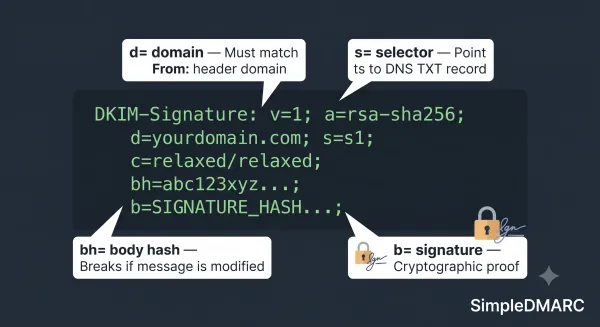
Why: DKIM (DomainKeys Identified Mail) is a digital signature on every outgoing email that proves it really came from your mail server and wasn't tampered with on the way. Like SPF, DMARC checks DKIM as part of its verification, so you want it on.
How: This depends on your email provider:
- Google Workspace: Admin console → Apps → Google Workspace → Gmail → Authenticate email. Generate the key, then copy the DNS record it shows you.
- Microsoft 365: Microsoft 365 Defender → Email & collaboration → Policies → DKIM. Select your domain and enable it.
- Zoho Mail: Admin Console → Domains → DKIM → Add.
Each provider gives you a DNS record to add. Add it to your DNS the same way you'll add the DMARC record in Step 4.
What to expect: The provider's setting page should show DKIM as "active" or "verified" within a few hours of adding the DNS record.
⚠️ Heads up: this is the most common place people get stuck. If your provider says "pending" for more than a day, the DNS record is usually slightly wrong — a typo in the name or a missing character at the end of the value. Compare what's in DNS exactly, character by character, to what the provider gave you.
Step 3: Pick an address for DMARC reports
What you're doing: Choosing where the daily DMARC reports should be sent.
Why: Once DMARC is on, mailbox providers will send you XML reports every day showing who sent email using your domain. These reports are how you spot spoofers and find your own services that aren't authenticated yet. The catch: the reports are dense XML files that are nearly unreadable by hand.
How: You have two practical options.
- Use a DMARC reporting service. Sign up for SimpleDMARC and you'll get an address to use in your DMARC record. The service ingests the XML and turns it into a plain-English dashboard.
- Send to your own mailbox. You can use something like
dmarc-reports@yourcompany.com, but you'll need to read XML yourself or build something to parse it. For a small business, this is rarely worth the effort.
For this guide, I'd use the reporting service. There's a free tier, and you'll save hours.
Step 4: Add the DMARC record to your DNS
What you're doing: Publishing the DMARC rulebook for your domain.
Why: This is the step that actually turns DMARC on. You'll add one line to your DNS — the same place you manage records for your website. Starting in monitor mode means DMARC watches and reports, but won't block any email yet. That's the safe way to start.
How: In your DNS provider's control panel, add a new TXT record with:
- Host or Name:
_dmarc - Type: TXT
- Value:
v=DMARC1; p=none; rua=mailto:reports@yourdomain.com
Replace reports@yourdomain.com with whatever address you picked in Step 3.
v=DMARC1; p=none; rua=mailto:reports@yourdomain.com
What to expect: Most DNS providers save the record immediately. To verify it's live, use the DMARC record checker at simpledmarc.com/tools.
⚠️ Heads up: it can take up to 24 hours for DNS changes to spread across the internet. If your check fails right after saving, wait a few hours and try again. Don't keep tweaking the record — you'll just confuse yourself.
Step 5: Wait a few weeks and read the reports
What you're doing: Letting reports come in so you can see who's actually sending email as your domain.
Why: You can't safely tell DMARC to start blocking spoofers until you know who all your legitimate senders are. The first two or three weeks are pure observation. You'll discover services you forgot about — the contractor sending invoices through her own Mailchimp, the old support tool nobody turned off — and you'll likely spot some genuine spoofing attempts too.
How: If you're using SimpleDMARC, just open the dashboard. You'll see each sender, how many emails they sent, and whether they passed authentication. For each sender that's failing but is yours, fix the SPF or DKIM setup for that service.
What to expect: A typical small business sees five to fifteen distinct senders in the first month. Some you'll recognise immediately. Some you won't — that's the value of the reports.
Step 6: Move from monitor mode to enforcement (later)
What you're doing: Tightening the rule from "watch only" to "actually block spoofers."
Why: Monitor mode (p=none) only reports problems. To actually stop phishing emails using your domain, you eventually move to p=quarantine (suspicious mail goes to spam) or p=reject (suspicious mail bounces).
How: Once your reports show all your legitimate senders passing authentication for at least two weeks, change p=none to p=quarantine in your DMARC record. After another month of clean reports, move to p=reject.
v=DMARC1; p=quarantine; rua=mailto:reports@yourdomain.com
Don't skip the gap. Going straight to p=reject before everything's authenticated is how legitimate emails get blocked.
Common questions
Will this break my email?
Not in monitor mode — p=none only watches and reports, it doesn't block anything. The risk only appears when you move to quarantine or reject, which is why the gap of two to four weeks of monitoring matters.
Do I need to do this on every domain I own?
Yes, including domains you don't actively send email from. Scammers love to spoof "parked" domains because nobody's watching them. For non-sending domains, you can use a stricter record right away: v=DMARC1; p=reject; rua=mailto:reports@yourdomain.com.
What if I use Gmail (the free version) for my business email?
DMARC only works on domains you own — yourcompany.com, not yourbusiness@gmail.com. If you're running a business, get a domain and a paid email plan. It's a low cost, and free Gmail is increasingly a credibility problem for B2B sales anyway.
How much does this cost?
The DMARC record itself is free — it's just a DNS entry. SPF and DKIM are free too. The only cost is a reporting service, and SimpleDMARC has a free tier that covers most small business volumes.
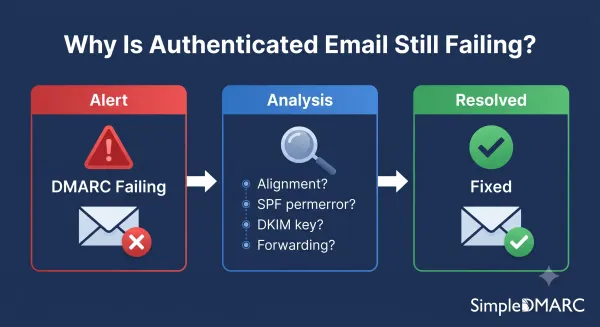
What if I have no idea who's sending email from my domain?
That's exactly why you start in monitor mode. The first month of reports is a discovery exercise. Don't try to figure it all out beforehand.
My DNS provider doesn't have an option called "_dmarc" — what now?
It's not a preset, you type it into the host or name field yourself. Some DNS interfaces auto-append your domain (so you type _dmarc and it shows _dmarc.yourcompany.com); others want the full thing. If both options give you an error, your provider's help docs will have the exact format.
What's next
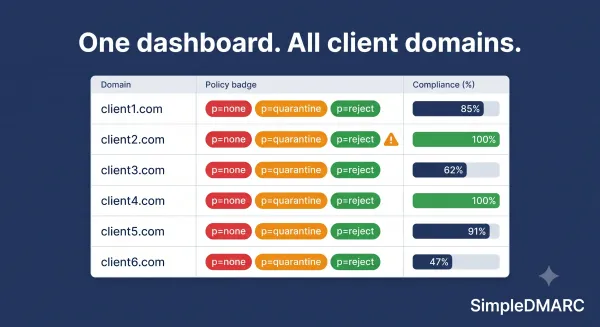
Once monitor-mode DMARC is in place, you can see exactly who's sending email from your domain — including services you forgot about and any spoofing attempts. SimpleDMARC reads those reports for you and turns them into a plain-English dashboard. You can start free at simpledmarc.com/pricing and have it running in a few minutes.
Before you sign up, the free toolbox at simpledmarc.com/tools has 30 utilities for checking SPF, DKIM, DMARC, BIMI, MX records, and blacklists — useful both during setup and afterwards when you're working through report findings. If your SPF or DKIM setup needs work — which the first reports will tell you — that's the natural next step before tightening DMARC to enforcement.